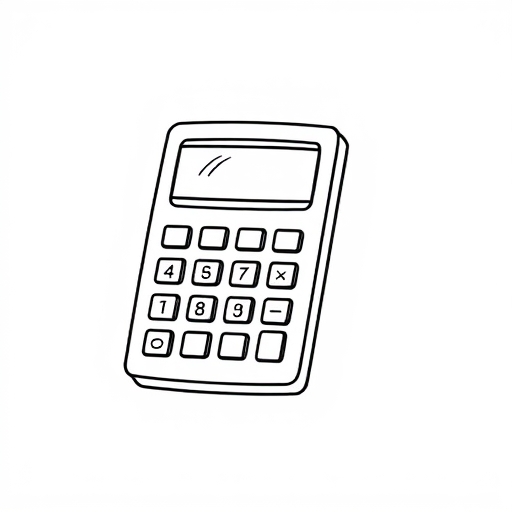
How to Draw a Calculator: A Step-by-Step Guide
Drawing a calculator may seem like a simple task, but capturing the details and proportions can be a fun and educational experience. Whether you’re an aspiring artist or just looking to improve your drawing skills, this guide will provide you with step-by-step instructions, tips, and techniques to help you create a realistic calculator drawing.
Table of Contents
- [Why Draw a Calculator?](#why-draw-a-calculator)
- [Materials Needed](#materials-needed)
- [Step-by-Step Instructions](#step-by-step-instructions)
- [Step 1: Basic Shape](#step-1-basic-shape)
- [Step 2: Adding the Screen](#step-2-adding-the-screen)
- [Step 3: Drawing the Buttons](#step-3-drawing-the-buttons)
- [Step 4: Adding Details](#step-4-adding-details)
- [Step 5: Final Touches](#step-5-final-touches)
- [Tips for Drawing a Calculator](#tips-for-drawing-a-calculator)
- [Common Mistakes to Avoid](#common-mistakes-to-avoid)
- [Calculator Drawing Variations](#calculator-drawing-variations)
- [FAQ](#faq)
- [Conclusion](#conclusion)
- Sketch paper or a drawing pad
- Pencils (HB for sketching, 2B or 4B for shading)
- Eraser
- Ruler
- Fine-tip pens or markers (optional for outlining)
- Colored pencils or markers (optional for coloring)
- Use Reference Images: Look at real calculators or images online to get an idea of proportions and details.
- Practice Shapes: If you find it difficult to draw the buttons or the screen, practice drawing these shapes separately before combining them.
- Take Breaks: If you feel frustrated, take a break and come back to your drawing with fresh eyes.
- Ignoring Proportions: Make sure the size of the screen and buttons are proportional to the calculator body.
- Rushing Details: Take your time with the details; they can make or break the realism of your drawing.
- Overcomplicating: Stick to a simple design for your first drawing. You can always add complexity later.
Why Draw a Calculator?
Calculators are ubiquitous tools in our daily lives, often used for math, science, and finance. Drawing a calculator can enhance your observational skills, improve your understanding of geometric shapes, and help you practice shading and perspective. Moreover, it’s a great exercise for those interested in technical drawing or product design.
Materials Needed
Before you start, gather the following materials:
Step-by-Step Instructions
Step 1: Basic Shape
1. Draw a Rectangle: Start by drawing a large rectangle for the calculator’s body. Use a ruler to ensure the lines are straight.
2. Add Rounded Corners: To give it a more realistic look, slightly round the corners of the rectangle.
3. Create the Base: Draw a smaller rectangle at the bottom of the larger rectangle. This will serve as the base of the calculator.
Step 2: Adding the Screen
1. Position the Screen: Draw another rectangle at the top part of the calculator body. This should be narrower than the body and centered.
2. Screen Details: Inside this rectangle, draw a smaller rectangle to represent the screen’s inner display. You can add some horizontal lines to indicate the grid lines often seen on calculator screens.
Step 3: Drawing the Buttons
1. Layout: Divide the area below the screen into a grid for the buttons. Most calculators have a 4×4 grid of buttons, but you can adjust according to the design you prefer.
2. Draw the Buttons: For each button, draw small squares or rounded rectangles, spaced evenly apart. Make sure to leave some space between them for a realistic look.
3. Label the Buttons: You can add numbers, symbols (like +, -, ×, ÷), and other functions (like =, AC) inside the buttons. Use a fine-tip pen for clear, legible text.
Step 4: Adding Details
1. Texture and Shading: Use your 2B or 4B pencil to add shading to the buttons and the body of the calculator. Focus on the edges and areas that would be in shadow.
2. Highlight the Screen: Leave a small area on the screen blank to indicate a light reflection. This adds depth to your drawing.
3. Add Additional Features: If your calculator has any extra features, such as a solar panel or a speaker, add those details now.
Step 5: Final Touches
1. Outline: If you wish, go over your pencil lines with a fine-tip pen or marker to make the drawing stand out.
2. Erase Pencil Marks: Once the ink is dry, gently erase any remaining pencil marks.
3. Coloring (Optional): If you want to add color, use colored pencils or markers to fill in the calculator. Common colors include gray, black, and blue.
Tips for Drawing a Calculator
Common Mistakes to Avoid
Calculator Drawing Variations
| Type of Calculator | Description | Key Features |
|---|---|---|
| Basic Calculator | Simple design for basic arithmetic. | Basic buttons, no advanced functions. |
| Scientific Calculator | Used for advanced mathematics. | Functions for trigonometry, logarithms, etc. |
| Graphing Calculator | Displays graphs and complex equations. | Large screen, multiple functions, and graphing capabilities. |
| Financial Calculator | Used for finance and accounting. | Functions for calculating interest, amortization, etc. |
FAQ
Q: Do I need to be an artist to draw a calculator?
A: No, anyone can learn to draw with practice! Follow the steps and focus on shapes and proportions.
Q: Can I use a digital tool to draw a calculator?
A: Absolutely! Many drawing apps allow you to create digital illustrations with ease.
Q: How long will it take to draw a calculator?
A: It depends on your skill level. A beginner might take 30-60 minutes, while an experienced artist could finish in 10-20 minutes.
Q: What if I make a mistake?
A: Don’t worry! You can erase and fix mistakes, or incorporate them into your drawing as part of the creative process.
Q: Can I add my own designs to the calculator?
A: Yes! Feel free to customize your calculator with unique colors, patterns, or additional buttons.
Conclusion
Drawing a calculator can be a rewarding experience that enhances your artistic skills. By following the steps outlined in this guide, you’ll create a detailed and realistic calculator drawing. Remember to practice regularly, and don’t hesitate to experiment with different styles and designs. Happy drawing!


